STL file FANCY MODULAR INK STAMPING AND WAX SEALING KIT (COMMERCIAL USE) 🦭・3D printable model to download・Cults
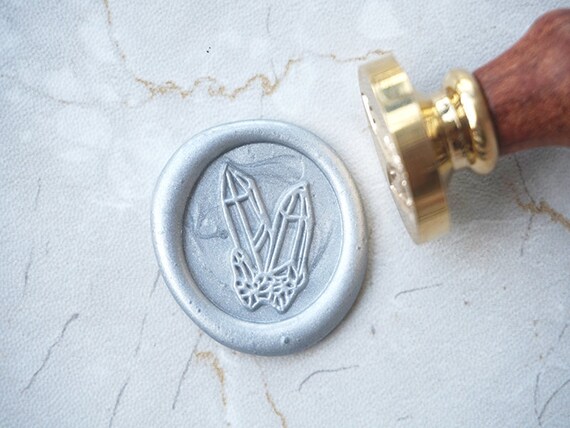
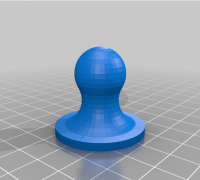
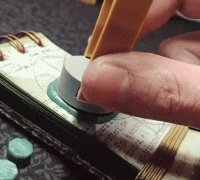
**THESE FILES ARE FOR COMMERCIAL USE. Enjoy as you please :)** **YOU MAY MODIFY THIS DESIGN TO YOUR LIKING. Please give proper attributions if you post your updated design on social media or another format, we really appreciate it :)** This kit includes two STLs--one upper (Shaft) and one lower (Block) part, which can be interchanged and connected using two parallel dovetail joints. You can make any amount of designs on the lowers and simply swap them out for your use (requiring significantly less filament than reprinting an entire stamp). We designed this kit for a customer who was an avid fan of wax sealing/letter sending and wanted their own designs to stamp and seal forms and letters. The blank stamping/sealing block can be modified to accommodate any design 1.5in x 1.5in; however, the scale can also be modified to accommodate larger or smaller specifications. We recommend that if you would like to use it for ink stamping, you should extrude the design out from the flat of the bottom of the block (positive extrusion) and sand the printed design against a flat surface to ensure a uniform flatness (so all parts of the design touch the paper uniformly when stamping) and for wax sealing you should indent the design into the bottom of the block (negative extrusion) so as to make the wax pop out when you pull off. We had a lot of trial and error to get this final design, and we are now in the process of designing new stamping shafts to accommodate the same dovetail system, and also experimenting with a screw-on/off system. From our experience, we can suggest a few tips to save you some time with getting a good final stamp/seal. First, if wax sealing, you will want to either dip the design on the bottom in a thin pool of vegetable oil (or another similar oil) before stamping to avoid wax sticking to your design, or Second, you should dip the lower ~25% of the block in ice water before and in between uses for about 30 sec (give or take) to create a temperature differential between the wax and your printed design and avoid wax sticking to it. Implementing both of these tips will give you significant success in your sealing adventures, although they can be messy, so keep (paper) towels on hand to keep your workspace clean. For ink stamping, as stated above, you should place sandpaper on a flat surface and sand your printed design against it in even circular motions to create a uniform and flat surface which will significantly improve the look of your completed stamp; also, the more ink you use the better, so the cheap ink pads from Walmart might not work as well but they will certainly work to a degree. We would absolutely avoid painting the printed design at all, as any paint, acrylic or otherwise, will peel off when introduced to many inks and especially when exposed to oil and hot wax (trust us on that), though you can somewhat get away with using smooth-on to coat your design, but if it were us we would just stay away from that too, just to be safe. Plus it can get into the thin parts of a design and alter the quality of the final stamp/seal, so yeah, use that knowledge as you please, but you've been informed. We recommend you print these files in PETG to avoid breaking along the length of the upper, as PETG will be incredibly resistant to the pressure, pushing, twisting, and rocking that will inherently come with using them for the purpose they were designed for. You can print the lower at a normal 20% infill density.We print all of our uppers in PETG @100% infill to give it a nice hefty feel in the hand and to allow the most durability, though you can likely get away with 60-80% infill as well if the risk is worth it and you really don't want to use that much filament. We tried printing the upper in PLA initially at a low infill and they broke after just a couple of uses, but maybe 100% infill PLA will work nicely if you don't have PETG. Using this knowledge, you will save yourself the significant time spent doing the trial-and-error approach that we did, and you can get right to doing the very thing you got this design for.
wax seal 3D Models to Print - yeggi

Free STL file Deathly Hallows wax stamp 👨🎨・Template to download and 3D print・Cults

STL file Diagnostic wax-up 3D dental model 🦷・3D print object to download ・Cults
/https://files.cults3d.com/uploaders/13449874/illustration-file/a54c5074-e574-4228-9f5f-d983289c2ed2/3.jpg)
Wax Stamp best STL files for 3D printing・7 models to download・Cults
wax seals 3D Models to Print - yeggi
wax seal stamp 3D Models to Print - yeggi
wax seals 3D Models to Print - yeggi

Custom Wax Seal Stamps by EdsCraftworks, Download free STL model
wax seals 3D Models to Print - yeggi

Free STL file Deathly Hallows wax stamp 👨🎨・Template to download and 3D print・Cults

wax seals 3D Models to Print - yeggi
STL file FANCY MODULAR INK STAMPING AND WAX SEALING KIT (COMMERCIAL USE) 🦭・3D printable model to download・Cults
**THESE FILES ARE FOR NON-COMMERCIAL, PERSONAL USE ONLY. The commercial version is also available on our page if you're interested in selling these

Fancy Modular Ink Stamping and Wax Sealing Kit (PERSONAL USE)
Seal seals for your Valentine's Day cards!, Now you can print your own stamps for your letters to your loved ones, giving them a special and very

Wax seals/lacquer Pack
STL file FANCY MODULAR INK STAMPING AND WAX SEALING KIT (COMMERCIAL USE) 🦭・3D printable model to download・Cults